Thursday 5 December 2013

Ways to Tell Your Ignition Is Dead


Although a bad fuel pump or a blocked fuel line will prevent your car engine from starting, the most likely cause is a faulty ignition system. On the other hand, if the starter fails to turn the engine over, you either have a dead battery, a loose terminal or a faulty ignition switch. If the starter is working, one of two components has failed: the ignition coil, or the distributor. To isolate the problem, test each component in turn as follows.

Battery

  • Step 1: Test your battery.
    Switch the headlights on. If they light up normally and stay bright, the battery is sound. If not, the battery clamps may be loose and/or the terminals may be caked with green corrosion preventing proper contact. If this is the case, remove the clamps, flush the terminals with a mixture of bicarbonate of soda and water, then abrade the contact surfaces down to bare metal with coarse emery tape. Reconnect the battery, tighten the starter motor terminal nuts and try to start the engine. If this fails, you either have a dead battery or a faulty starter motor.

Ignition Switch

  • Step 2: Check your ignitoin switch.
    Test the ignition switch after ensuring that the battery is sound by turning it halfway to the “on” position. If the warning lights on your dashboard fail to light up, the ignition switch is faulty. Another way to check is to turn the headlights on and then try to crank the engine. If the engine turns over and the lights dim or go out completely, the ignition switch is sound. If not, replace the ignition switch.

Distributor

  • Step 3: Check your distributor.
    Undo the spring clips on the side of the distributor and remove the distributor cap. Have a helper turn the engine over with the ignition switch and watch the rotor. If the rotor fails to turn, either the distributor drive gear has stripped, or the camshaft drive belt or gears are faulty and must be replaced by a qualified technician.
    If the rotor turns, look for signs of moisture inside the cap. If it’s damp, wipe the inside with a paper towel and dry out the cap and the distributor body with a hair dryer.
    Inspect the distributor cap for cracks, pitted or warn terminals around the perimeter, or signs of burns indicating an electrical short caused by carbon tracking. Inspect the edge of the brass contact on the rotor arm for signs of pitting or charring. If the distributor cap and/or the rotor are damaged, replace them.

Ignition Coil

  • Step 4: Check your ignition coil with a spare spark plug.
    Disconnect the high voltage lead connecting the coil to the center of the distributor cap. Use a piece of insulated wire to connect the loosened coil high voltage wire to the terminal of a spare spark plug and wrap some insulating tape around the connection. Strip the insulation off the ends of a second piece of wire. Twist one end around the spark plug threads and connect the other end to a suitable ground point on the engine. Attach a third “jumper” wire to the green negative terminal on the coil and turn the ignition switch to the “on” position. Tap the end of the jumper wire against a good ground point on the engine while watching the spark plug. If you see a strong white spark leap across the plug terminals every time you tap the wire on the engine, the coil is sound.

Ignition Coil Voltage and ResistanceTest.

  • Step 5: Check your coil's primary and secondary resistance.
    If you fail to get a good spark across the test plug terminals, do a coil voltage test. Set a volt-ohm meter to the direct current setting (DC). Turn the ignition switch to the “on” position. Place one of the probes against the terminal connecting the black wire to the coil and touch the other probe to a good ground point on the engine. You should get a reading of approximately 12 volts. Repeat this test on the coil’s green ground terminal; you should get the same reading of about 12 volts.
    Adjust the volt-ohm meter to the ohms resistance setting. Touch one of the probes to the black positive wire on the coil, and the other probe to the green negative wire to test the coil’s primary resistance. The reading should be between 0.4 and 0.6 ohms. To test the coil’s secondary resistance. Insert one of the probes into the central high voltage terminal on the coil and touch the other probe on the green negative terminal on the coil. The reading should be somewhere between 5,000 and 7,200 ohms. If the coil fails any of the above tests, replace it to correct your dead ignition system.
  • Drop your comments on any other issue that can cause the ignition from start.

Monday 2 December 2013

The Problems With a Volkswagen Jetta.


The Problems With a Volkswagen Jetta......

Problems With a Volkswagen Jettathumbnail
The Jetta is a small car manufactured by German automaker Volkswagen since 1979. Redesigned several times, the Jetta continues to be a popular mid-range car in the United States and around the world. Despite Volkswagen's reputation for quality and the Jetta's generally positive reliability ratings, several problems are common to the Jetta that owners and potential buyers should be aware of.


Engine Problems


 The most common problems experienced by Jetta  owners involve the vehicle's engine. Although the Jetta  has been available with a wide range of engine options  over the years and for various trim levels, many of the  engine problems are widespread. Frequent Check  Engine warning lights will indicate anything from an  engine misfire due to a faulty ignition coil, errant spark  plugs or maladjusted fuel injectors. Some Jetta engine  problems are more common in cold weather.


Electrical Problems


 The Jetta has also been known to have problems with its  electrical system. Partial failure of the electrical system  has resulted in power automatic door locks not working  or power windows that operate only intermittently. Other  electrical problems involve the dashboard display where  warning lights can sometimes be engaged without any  actual problem occurring in the vehicle. Other electrical  problems reported by Jetta owners involve the car's  battery and alarm system.


Problems With a Volkswagen Jettathumbnail
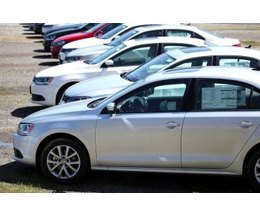
Row of brand new Jetta's on a Volkswagen dealer lot(Photo: Justin Sullivan/Getty Images News/Getty Images)
The Jetta is a small car manufactured by German automaker Volkswagen since 1979. Redesigned several times, the Jetta continues to be a popular mid-range car in the United States and around the world. Despite Volkswagen's reputation for quality and the Jetta's generally positive reliability ratings, several problems are common to the Jetta that owners and potential buyers should be aware of.

Engine Problems

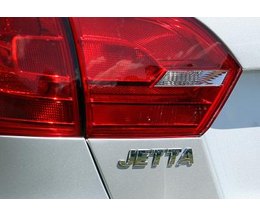
Front view of Volkswagen Jetta(Photo: David McNew/Getty Images News/Getty Images)
The most common problems experienced by Jetta owners involve the vehicle's engine. Although the Jetta has been available with a wide range of engine options over the years and for various trim levels, many of the engine problems are widespread. Frequent Check Engine warning lights will indicate anything from an engine misfire due to a faulty ignition coil, errant spark plugs or maladjusted fuel injectors. Some Jetta engine problems are more common in cold weather.

Electrical Problems

Volkswagen Jetta display(Photo: J. Emilio Flores/Getty Images News/Getty Images)
The Jetta has also been known to have problems with its electrical system. Partial failure of the electrical system has resulted in power automatic door locks not working or power windows that operate only intermittently. Other electrical problems involve the dashboard display where warning lights can sometimes be engaged without any actual problem occurring in the vehicle. Other electrical problems reported by Jetta owners involve the car's battery and alarm system.

Safety Recalls


Modern generations of the Volkswagen Jetta have been recalled numerous times for dealers to service safety equipment. In 2007, over 300,000 Jettas were recalled due to a problem with the headlights. Another recall that same year dealt with a windshield wiper issue that affected nearly 60,000 vehicles. A 2004 recall of more than 400,000 vehicles dealt with Jettas that were manufactured with a faulty hazard light system switch. Braking problems were addressed in a 2007 recall of just over 13,000 Jetta models.


Mechanical Recalls


 Other recalls have been enacted to repair or replace  other components in the Jetta not directly related to  safety. In 2009, a problem with the driveshaft prompted t  he recall of some 25,000 vehicles. More than 19,000  Jetta models equipped with a diesel engine were the  subject of a recall in 2004 involving the fuel system. This  came following a 2002 recall of close to half a million  vehicles because of problems with the gas tank cap and  filler pipe.


Other General Problems


 Some problems with the Volkswagen Jetta are less  substantial, but incorporate customer dissatisfaction in a  number of areas. One of these problems is the Jetta's  high price within its class. Car critics have complained  about the Jetta's overall reliability, which, for some model  years, has been calculated to be below that of other cars  in Volkswagen's lineup. Depending on the engine used,  some Jetta models are also consume a great deal of fuel  relative to their power and size.

Looking @ Honda CRV Transmission Problems


The Honda CR-V, a compact crossover sport utility vehicle available with a manual or automatic transmission, was introduced in 1995. Edmunds.com contends that the CR-V is a competitively priced SUV with ample cargo and passenger room


Manual Transmission

  • Honda technical service bulletins, or TSBs, report that multiple CR-V model years suffer from manual transmission shifting difficulty. Problems mainly occur when shifting from second to fifth or third to fifth gear. The most common reason for shifting difficulty in manual transmission is lack of transmission fluid.

Automatic Transmission

  • Honda TSBs indicate that multiple CR-V automatic transmission models suffer from "harsh" shifting and acceleration problems. The primary cause of the CR-Vs' shifting problems is transaxle leakage. TSBs also state that shifting problems may result in acceleration problems, including noise and vibration.

Recall

  • In 2002, Honda issued a recall on over 237,000 CR-V automatic transmission models manufactured between 2002 and 2003. The recall notice states that certain automatic transmissions may suffer from shift cable linkage corrosion. Corroded shift cable linkage may prohibit drivers from shifting the CR-V into park.

Check the Honda Cr-V Problems.


The CR-V is a small, four-door crossover SUV from Japanese automaker Honda. It was first sold in Japan in 1996 and came to the North American market in 2007. The CR-V was redesigned in 2002, and again for the 2007 model year. Despite Honda's reputation for quality vehicles and the CR-V's generally good safety and reliability ratings, there are several common problems with the vehicle that owners and potential buyers should be aware of.

Climate Control

  • One of the most common problems with the Honda CR-V involves the climate control for both the heater and air conditioning system. Air conditioning problems generally begin with a faulty condenser which, when it fails, can allow metal or other debris to enter the rest of the air conditioning system. This results in a costly repair since many components may need to be replaced. Leaky heater cores have also been reported by some owners, along with minor problems with the heater's electrical sensors.

Transmission Problems

  • Another common source of problems with the CR-V involves the transmission. The CR-V has been sold with several different transmissions, including manual and automatic models. Electrical faults sometimes produce an error message that makes it seem as though there is a problem with the automatic transmission when in fact no such problem exists. Automatic transmissions in the CR-V are also sometimes prone to leaking transmission fluid. Excessive noise during shifts has also been reported with both the automatic and manual transmissions in the CR-V.

Mechanical Recalls

  • The CR-V has been the subject of several recalls by Honda due to mechanical defects. In 2003 Honda recalled nearly a quarter million vehicles due to a problem with the shift cable on the automatic transmission. New cables were installed to prevent vehicles from accidentally shifting and rolling while parked. Another 2003 recall was enacted to repair a problem with the ignition lock on around 75,000 CR-Vs. In 1999 over 100,000 vehicles were recalled because of problems with a wiring harness in the dash.

Safety Recalls

  • Another group of CR-V recalls dealt specifically with safety equipment. A 2006 action involving more than one million vehicles forced Honda to send updated information that corrected an erroneous emergency phone number in owners manuals. Rather than recall the affected vehicles, Honda sent postcards to owners with the correct information listed. In 2004 around 7,000 vehicles were recalled because of a problem with the passenger seat airbag sensors. That same year more than 130,000 Honda vehicles, including many CR-Vs, were recalled for an unrelated airbag issue.

General Problems

  • Some other problems with the Honda CR-V are the general shortcomings observed by drivers and automotive critics. Many have bemoaned the CR-V's mediocre power and handling, which are adequate for most driving, but do not measure up to the performance level of some SUVs during bad weather, off-road, or in emergency situations. Some drivers have also cited the CR-V's lack of interior legroom and uncomfortable seats. Storage has also been an issue, with some owners finding the roof-mounted luggage rack difficult to use, or expensive to install.
If there are other problems that are not mentioned above, please feel free to post them on here for people to see and also know. 

So have this in mind when buying a Honda Crv Car.....I still rep the Car is still a durable car for use.

Friday 29 November 2013

The Best Way to Remove Minor Scratches on a Car.


If a car only has minor scratches, there are several reasons to fix them at home. It's less expensive to take care of minor scratches in a driveway instead of a detailing shop, and the work can be done on the car owner's timetable instead of on a professional's. It's not hard or expensive to fix minor scratches, but it does take a bit of time and attention to detail.

Instructions
1: Wash the area that will be worked on with warm water that has been made soapy with dishwashing detergent. Allow the area to dry thoroughly.

2: Rub a bit of shoe polish into the scratch. Use a color that contrasts with the paint. For example, if the car is white, use black. This will help keep you from sanding too deep and damaging the car's paint.

3: Wrap 2000-3000 grit sandpaper around a block of wood. Dip it in a bucket of cold water that has a couple drops of dishwashing liquid added to it. Gently sand the area of the scratch with short strokes, stopping to rinse the sandpaper frequently. Stop sanding immediately when the shoe polish mark disappears.

4: Dry the area with a soft cloth, then apply a small amount of rubbing compound and buff with a terry cloth washcloth. This will help to get rid of any marks from the sandpaper.
5: Wipe with a clean, dry cloth. If the area looks dirty, wash it with a sponge and warm water. After the area is dry, apply car wax.

Check out The Problems With Flooded Cars.....


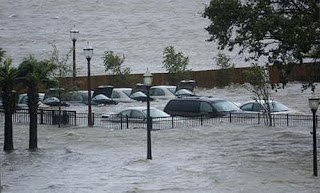
  1. When purchasing a used car, buyers may run into flood damage. With hundreds of thousands of vehicles damaged in recent hurricanes and floods, it has become a significant issue. Buyers should be aware of the problems that flood damage can cause and how to spot these vehicles.


  2. Mold

    • Mold will be present in flooded cars unless it has been removed.
      Possibly the most obvious problem from flood damage is that mold will grow anywhere water has lingered, especially if the car sat for days in the hot sun. Mold will grow in the fabric of the car, such as the seat, carpet and headliner, but these can be replaced. Mold can also grow in the air conditioning system causing respiratory problems in passengers.

    Rust

    • Rust will eventually destroy the metal in a car.
      Rust, like mold, grows wherever water has sat for long. It can affect the body and frame of the car, the engine components, the screws and bolts, the gas tank, muffler and more. Once rust has appeared on a vehicle it is difficult to eliminate it. Rust can weaken the structure of the car. If it has gotten inside the engine's cylinders it will destroy the engine at worst or burn excessive oil at best.

    Engine

    • Water in the engine is an all around recipe for disaster if not dealt with properly before starting the vehicle. Not only can it cause rust, but the water itself will cause damage. If cylinders are full of water, it will not be compressed like air and everything connected to the cylinders will bend or break. Water mixed with the transmission fluid or oil will reduce the lubrication, also resulting in damage.

    Computer and Electronics

    • Water and electronics do not mix.
      This is the part of a car that sustains the worst damage. It can take months to appear, and it is very expensive to repair. The computer is the brain of the car. Damage can cause malfunctions in seat controls, electric windows, door locks, starter, headlights, horn, etc. But computer and electronic damage can also be deadly when it affects the anti-lock brake system or the airbags.

    Is it a Flooded Car?

    • Unfortunately it is relatively simple for car dealers to launder a car title. They simply purchase a flood-damaged vehicle and clean it up so it's difficult to see the damage. If it has a salvage title, it can be re-titled in a state that will issue a clean title. When this happens the only way to know if the car has been flood salvaged is with some detective work.
      Some of the tell-tale signs that a car has been flooded include mud in the trunk, water marks or drops inside instrument panels, wet or "dried-out" owner's manual and warped interior panels. Give the interior of the car a good sniff; question any smells such as mold, bleach or Lysol.
      Get it inspected by a professional and run a VIN check. CARFAX and NICB both have a free VIN check system that will alert you to any reported flood damage on a vehicle

Know How to Change a 2004 Toyota Camry Fuel Filter.


There is no set interval for changing the fuel filter on a 2004 Toyota Camry; however, it is common practice to replace the fuel filter every 30,000 miles for preventative maintenance reasons. There is little notice when a fuel filter begins to fail, but when it does it can foul the fuel injectors. A fuel filter failure can also cause a fuel pump failure and a lean mixture causing destructive detonation.

Instructions

1: Loosen the lower flare nut on the bottom side of the fuel filter slowly, to relieve the fuel pressure. Hold the filter square nut with one wrench and remove the fuel line from the filter with another wrench.

2: Remove the upper banjo bolt, using a line wrench. When removing the banjo bolt, remove the upper and lower copper bushings. Remove the filter bracket, using the appropriate socket. Remove the fuel filter.

3: Install the new fuel filter into the filter bracket and tighten the bracket with the appropriate socket. Install the lower flare nut fuel line and tighten securely.

4: Install two new copper gaskets on both sides of the banjo bolt. Insert the bolt and tighten securely.